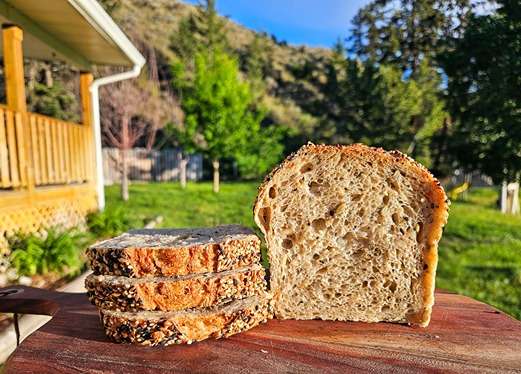
Seedy Sourdough Sandwich Bread
This beginner-friendly seedy sourdough sandwich bread recipe simplifies the process, stripping away most of the fancy techniques. If you’re new to sourdough baking and want a straightforward approach to creating a delicious seedy sandwich loaf, this method is perfect for you. It focuses on the basics, ensuring that you can achieve a satisfying result without feeling overwhelmed by intricate details or specialized equipment.
Ingredients
- 500 g All-purpose Flour
- 250 g Whole-wheat Flour
- 500 g Water
- 300 g Active Starter
- 20 g Salt
Seed Mix
- 1/3 cup Pumpkin Seeds 50g
- 1/3 cup Sunflower Seeds 50g
- 2 tbsp Flax 20g
- 1/4 Cup Millet 40g
- 2 tbsp Sesame 20g
- 1 tbsp Poppy 10g
Instructions
- Prepare the Dough: In a sturdy mixing bowl, add lukewarm water and active sourdough starter. Use your hands or a spatula to break up the sourdough starter into small, shaggy pieces.
- Add the Flours and Salt: Add white flour, whole wheat flour, salt, and seed mix. Mix until everything is incorporated, and there are no dry bits remaining.
- First Rest: Cover the bowl and let the dough rest for 1 hour.
- Stretch & Fold: After 1 hour, perform the first round of stretch-and-folds. Stretch the dough all the way around, folding it over itself 4-8 times until the dough feels tight. Cover the bowl and let it rest for another 30 minutes.
- Second Stretch & Fold: After 30 minutes, repeat the stretch-and-fold process, making sure the dough becomes tight. This makes a total of 2 rounds of stretch-and-folds.
- Bulk Fermentation: Let the dough rest until it has nearly doubled in size. This could take anywhere from 4-12 hours, depending on the temperature of your house. If your house is cold, it will take longer, and if it’s warm, it will take less time.
- Shape the Dough: After bulk fermentation, turn the dough onto the counter. Divide the dough into two equal portions using a scale or by eye. Shape each portion into a round ball and let it rest for 30 minutes. If the dough still feels tight after 30 minutes, let it rest for an additional 30 minutes.
- Prepare Loaf Pans: Use either non-stick pans, grease with butter and flour your pans, or line with parchment paper.
- Final Shaping: After resting, flip each dough ball over so the smooth side is down. Gently shape each loaf by folding in the sides and creating tension to create a strong oval loaf. Optional seeded crust: This would be the time to lightly wet the surface of your loaf and dab into a vessel of mixed seeds. Place the shaped dough seam side down into loaf pans. Repeat with the second loaf.
- Cold Proof: Cover the loaf pans and place both loaves in the fridge for 8-24 hours for a cold proof. The longer the cold proof, the more complex the flavor.
- Preheat the Oven: After the cold proof, preheat your oven to 500°F (260°C). Place a metal baking tray or muffin tin at the bottom of the oven to generate steam (this is optional but highly recommended for a crisp crust).
- Score the Loaves: Once the oven is preheated, take the loaves out of the fridge. Lightly flour the loaves and score them with a sharp knife or lame. Skip the flouring if you have a seeded crust.
- Bake the Bread: Open the preheated oven and carefully place the loaves inside. If you added a steam tray, pour 1 cup of hot water into the vessel at the bottom of the oven immediately after placing the loaves in. Close the oven door to trap in the steam.
- Lower the Temperature: Drop the oven temperature to 375°F (190°C) and bake the bread for 40-45 minutes, or until the crust is golden and crispy.
- Cool the Loaves: Once baked, remove the loaves from the oven and place them on a cooling rack. Let them cool for at least 1 hour before slicing.
- Enjoy: Once cooled, slice your seedy sourdough sandwich bread and enjoy with a generous amount of butter, or use it for sandwiches, toast, or any other delightful dish!
Notes
If you want to do a seeded crust, refer to text or simply mix 1 part millet, 1 part flax, 1 part sesame. Lightly wet the surface of your dough and roll it into the seed mix.