Simple Sourdough Sandwich Bread
This beginner-friendly simple sourdough sandwich bread recipe simplifies the process, stripping away all non-essential techniques. If you're new to sourdough baking and want a straightforward approach to creating a delicious sandwich loaf, this method is perfect for you. It focuses on the basics, ensuring that you can achieve a satisfying result without feeling overwhelmed by intricate details or specialized equipment.
Ingredients
- 4 Cups White Flour 500g
- 2 Cups Whole-Wheat Flour 250g
- 2 Cups Water 500g
- 2 Cups Active Sourdough Starter 300g
- 4 tsp Salt 20g
Instructions
- Prepare the Dough: In a sturdy mixing bowl, add lukewarm water and active sourdough starter. Use your hands or a spatula to break up the sourdough starter into small, shaggy pieces.
- Add the Flours and Salt: Add white flour, whole wheat flour and salt. Mix until everything is incorporated, and there are no dry bits remaining.
- First Rest: Cover the bowl and let the dough rest for 1 hour.
- Stretch & Fold: After 1 hour, perform the first round of stretch-and-folds. Stretch the dough all the way around, folding it over itself 4-8 times until the dough feels tight. Cover the bowl and let it rest for another 30 minutes.
- Second Stretch & Fold: After 30 minutes, repeat the stretch-and-fold process, making sure the dough becomes tight. This makes a total of 2 rounds of stretch-and-folds.
- Bulk Fermentation: Let the dough rest until it has nearly doubled in size. This could take anywhere from 4-12 hours, depending on the temperature of your house. If your house is cold, it will take longer, and if it’s warm, it will take less time.
- Shape the Dough: After bulk fermentation, turn the dough onto the counter. Divide the dough into two equal portions using a scale or by eye. Shape each portion into a round ball and let it rest for 30 minutes. If the dough still feels tight after 30 minutes, let it rest for an additional 30 minutes.
- Prepare Loaf Pans: Use either non-stick pans, grease with butter and flour your pans, or line with parchment paper.
- Final Shaping: After resting, flip each dough ball over so the smooth side is down. Gently shape each loaf by folding in the sides and forming a tight, smooth ball. Place the shaped dough seam side down into loaf pans. Repeat with the second loaf.
- Cold Proof: Cover the loaf pans and place both loaves in the fridge for 8-24 hours for a cold proof. The longer the cold proof, the more complex the flavour.
- Preheat the Oven: After the cold proof, preheat your oven to 500°F (260°C). Place a metal baking tray or muffin tin at the bottom of the oven to generate steam (this is optional but highly recommended for a crisp crust).
- Score the Loaves: Once the oven is preheated, take the loaves out of the fridge. Lightly flour the loaves and score them with a sharp knife or lame.
- Bake the Bread: Open the preheated oven and carefully place the loaves inside. If you added a steam tray, pour 1 cup of hot water into the vessel at the bottom of the oven immediately after placing the loaves in. Close the oven door to trap in the steam.
- Lower the Temperature: Drop the oven temperature to 375°F (190°C) and bake the bread for 40-45 minutes, or until the crust is golden and crispy.
- Cool the Loaves: Once baked, remove the loaves from the oven and place them on a cooling rack. Let them cool for at least 1 hour before slicing.
- Enjoy: Once cooled, slice your sourdough sandwich bread and enjoy with a generous amount of butter, or use it for sandwiches, toast, or any other delightful dish!
Notes
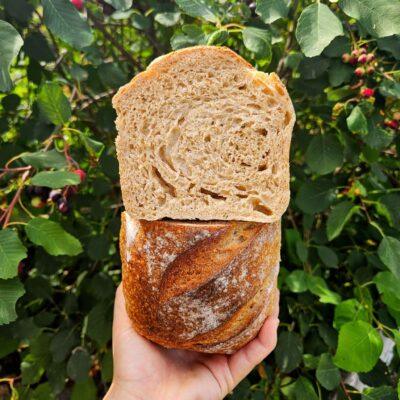
This recipe is for a double batch. However, this time around, with the same dough, I made one artisan loaf and one sandwich loaf. That is why you only see me bake one sandwich loaf.
Starting the bake at a high temperature improves the initial rise before a crust is formed. Dropping the temperate ensures an even coloured crust while still benefitting from the initial high heat.
Keep an eye on your loaf while it's baking. Every oven is different and you may find it gets dark too quickly at 375F. Feel free to reduce the temperature to 350F and extend the time to achieve a more even crust.